Wednesday, November 14, 2012

Blue Thank You


Hi there!  I have had a lot of fun playing around with alcohol inks lately. They are great for hand-coloring embellishments as well as creating interesting one-of-a-kind backgrounds. The card I’m sharing in this post is a thank you note created with a marbled alcohol ink background and metal butterfly accents (SU! embosslit die).  Until next time...

Stay inspired,

Sabrina


Thursday, November 8, 2012

Masculine Birthday


Greetings!  I am popping in very quickly to share a masculine birthday card I made for a family friend. It is very simple and I utilized some mosaic tiles I found on clearance at Michael’s along with a quote from a Studio G clear stamp set. I am submitting this card to this week's CASual Friday challenge to:
CFC77-Create a new Clean And Simple masculine project.

Thanks for dropping by!

Stay inspired,
Sabrina


Wednesday, October 31, 2012

Pleasant Poppies (2)


Hi there! I’m back for a second posting this week. This card is actually very similar to my last post in terms of materials and colors but with a different layout. This card is also a sympathy card for yet another friend who has recently experienced a loss (the third such event in the last few weeks). Again, the sentiment could easily be changed to something else. I am also submitting this card to the current CASual Friday challenge: CFC76: Create a Clean And Simple project using Kraft. 

That’s all for now--thanks so much for stopping by!

Stay inspired,

Sabrina


Tuesday, October 30, 2012

Pleasant Poppies (1)


Hello!  I hope everyone is well--especially those who were in the path of the hurricane the last few days.  Super storm Sandy packed quite a punch! The area where I reside fortunately did not see catastrophic damage like areas both north and south of the region that were hit pretty hard and are still affected by flooding. My prayers go out to all those who have experienced loss due to this storm.

Today’s blog post is another “all Stampin’ Up!” card. I’ve had a little time lately to play with some new goodies that I recently received. This card is actually a sympathy card that I made for a friend but the sentiment could easily be changed to something else. The color scheme was intentionally made to be masculine. The kraft in the color scheme happened to fit the theme for this week’s CASual Friday challenge so I am submitting it to: CFC76: Create a Clean And Simple project using Kraft.  Thanks for dropping by!

Stay inspired,

Sabrina


Monday, October 22, 2012

Sympathy


Greetings and thanks for stopping by!  Today’s post features a Stampin’ Up! stamp set (Thoughts & Prayers) and another alcohol ink background.   The background was actually stamped and heat embossed (Mulberry background stamp from CHF) before I applied the alcohol ink which gave it a leathery texture lending a masculine feel.  Until next time...

Stay inspired,

Sabrina


Inside view


Monday, October 15, 2012

I've Got Heart


Hi!  I’m here this week with a card that I am submitting to a challenge: CASual Fridays CFC74: Create a Clean And Simple project with a heart.  I got a little carried away with the texture on this design so I’m not sure it’s still considered “clean & simple”.  I used quite a bit of tone-on-tone so hopefully that helps to present a cleaner appearance. The heat embossed background panel is the first layer of texture. The heart is actually made from two die cuts that are designed to layer (I love using the Memory Box dies).  

Thanks for stopping by!

Stay inspired,

Sabrina


Monday, October 8, 2012

Stylish Happy Birthday


Hi there!

I’m back this week with a card I made for a dear friend for her birthday yesterday (Sunday). I decided to submit this card to the CASual Fridays challenge since this card certainly fits the challenge for the week:  CFC73:  For The Girls-Create a Clean And Simple card that celebrates the women in your life. I admire my friend for her strength, determination and her sense of style. I couldn’t help but use my old (and I believe retired) paper doll dies from Quickutz to wish her a "happy birthday". I gave the doll a sparkly top and a bit of "shine" on the doll's accessories (glitter/silver heat embossing). The papers I used are from Stampin’ Up! and I also used a Stampin’ Up! embossing folder (Adorning Accents) for the edge detail. I love using the paper doll die set because it is so versatile. You can see another card that I posted earlier in the year using the same paper doll die set HERE.

Thanks for dropping by!

Stay inspired,

Sabrina


Monday, October 1, 2012

Formal Thank You


Hi there!  Have you ever been overwhelmed by wonderful hospitality? That very thing happened to my hubby and me several weekends ago. We traveled with some friends to NJ to visit with their extended family. We were welcomed to a HUGE dinner complete with the formal china and stemware. There was so much good food and the decor was lovely--I can truly say that I felt honored to be a guest. The conversation was even better than the feast. I could tell that the hostess labored over dinner preparations for a long while--everything was homemade and the smallest detail was attended to. It truly is an art to be able to extend great hospitality... We were in a formal setting but the feeling was warm and friendly. I felt like we were part of the family. I’m so thankful for the friends I have and for being able to get to know new friends!

The card below is what I sent to thank the gracious host and hostess. I made it a formal design on the outside but warmed it up with a handwritten note on the inside. I also included a stamped verse as the first inside layer (with my handwritten note on a second page below it--not shown). 

Thanks so much for looking!

Stay inspired,

Sabrina


I placed a stamped verse on the inside with a handwritten note on the second page just below.

Wednesday, September 26, 2012

Welcome, Autumn!


Hello and happy Fall!


My favorite time of year! I enjoy the beauty of the colorful leaves, the cool mornings and evenings and, yes, the return of football season. :-)

It’s been a while since I’ve been able to play in a challenge and I’m happy that I had time to play this week. All of the cards in this post fit the fun theme for this week’s CAS-ual Fridays challenge to create a CAS (clean and simple) design inspired by autumn (CFC71). The design for the third card below was made for last Wednesday's Splitcoast Stampers challenge sketch (SC403). I used alcohol inks to create some of the background and accent papers and plain metal accents for the sketch challenge card. I also used distress inks to color in the leaf images and a combination of distress inks and alcohol inks to color in the die cut pear.

Thanks for looking!

Stay inspired,

Sabrina


Monday, September 24, 2012

Vivid Congratulations!


Hi there!

I am back this week with one more card using a patterned background by Hero Arts (Flower Dot Pattern). I have made several cards with this same background stamp and same basic technique, each resulting in different looks.  You can view my previous posts for photos and descriptions (Heartfelt Thanks, Happy Thanksgiving).  This time, I heat embossed a background panel in silver and then colored the image with Ranger Distress Re-Inker without blotting or spritzing with water. Once the panel dried, I used alcohol ink on the red portions to deepen the color (the red re-inker did not appear as vibrant as the blue and green after initial application). I had trouble placing a sentiment on this one since the background is so ornate. I opted to heat emboss a script sentiment onto vellum with a backing strip of paper to aid in adhering it to the panel. That’s it!  Thanks for checking in.

Stay inspired,

Sabrina


Below are the other cards that I created with the same Hero Arts background stamp (Flower Dot Pattern).


Monday, September 17, 2012

Happy Thanksgiving!


Hello! 

I have another Thanksgiving Card to share.  This design features a Hero Arts background stamp called Flower Dot Pattern that I used in a design shared in an earlier post (see Heartfelt Thanks). This time I stamped and heat embossed the background image with clear embossing powder before sponging the entire panel with Distress Ink giving it a more subtle look than the previous design (in Heartfelt Thanks). I used another metal leaf die cut as the focal point (see my previous posts to see other leaf cards: Autumn Glory and Fall Thank You) and a heat embossed Hero Arts sentiment as a finishing touch. 

Thanks for stopping by!

Stay inspired,

Sabrina


Monday, September 10, 2012

Heartfelt Thanks


Hello!  I am here this week with a couple of cards that I made using an August Hero Arts sketch and a Hero Arts background stamp. I heat embossed the stamped background image with white embossing powder before coloring the design with two colors of Ranger Distress Re-Inkers. I spritzed the panel with water and blotted to soften the colors. I then cut the panel in half to create two cards. I added die cut butterflies (cut from metal using Stampin’ Up! and My Favorite Things dies) to one card and I added a large sentiment on the second card using the same basic sketch.  That’s all for now. Thanks so much for looking!

Stay inspired,

Sabrina


Butterflies were die cut from metal.

Here is a close up shot of the butterflies:

Below is the Hero Arts sketch for a contest that I submitted my designs to on Aug. 22, 2012:

Monday, September 3, 2012

Purple Haze


Hi there!

I recently tried a technique called “water stamping” that was featured on the Splitcoast Stampers website and I just couldn’t stop at one (see Fall Thank You for my other creation with a water stamped background). I’ve had a lot of fun trying out different kinds and colors of inks with the technique. Below is a card that I created using the Hero Arts Zig Zag backgrounder stamp on a panel that I made with a purple ink gradient (sponged as well as direct to paper application of Stampin’ Up! and Distress Inks). I’m not certain of the maker of the sentiment stamp but it is a wood-mounted stamp that was likely on clearance at one of the local craft stores. I absolutely love using the dollar or bargain stamps whenever I see ones that I like. This one was appealing to me because of its size and the pretty script. Well, that’s it for today. Thanks so much for stopping by!

Stay inspired,

Sabrina


Closer view of the water stamped background.
*This design was submitted to a Hero Arts contest on Aug. 22, 2012.

Monday, August 27, 2012

Sweet Baby Shower Card


Hi there!

I am back to share a card I made for a friend’s baby shower to prepare for the arrival of her son. I am also submitting this one to the CAS-ual Fridays Challenge (CFC67) to create a card featuring banners or flags. I made this one with several layers and used one of my favorite background stamps (CHF) to create a denim look for the main panel. I added just a tiny bit of Copic coloring on the stamped focal image before layering it on die cut circles and a label die cut. The label was placed on a satin ribbon (banner).


While I was making my friend’s shower card, I thought I would also make a set of Thank You note cards as part of a her gift. These cards are smaller than A2 size and very simple in composition and style. I used stamps from the same Fiskars baby collection as well as a sentiment from a retired Stampin’ Up! set (Teddy & Train).  The banners were die cut with a MFT Sentiment Strip die. There are six cards total in the set that I made for her:  three in green shown in the photo below and three more in blue.


Well, that’s all for now.  Thanks so much for stopping by!

Stay inspired,

Sabrina


Wednesday, August 22, 2012

Autumn Glory


Hi there!

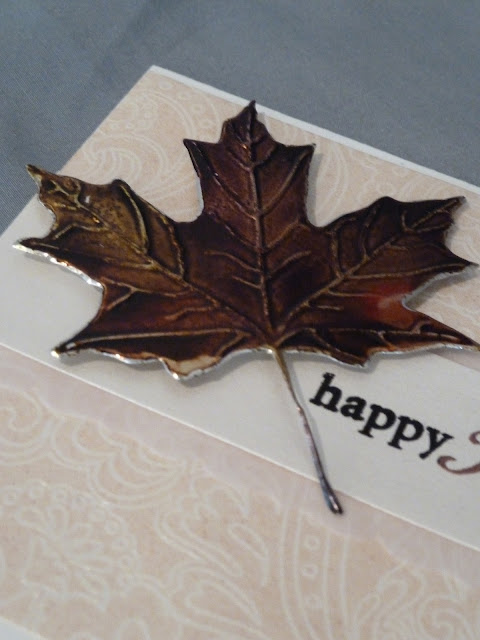
I’m back with another card design for a CAS (clean and simple) sketch challenge at Splitcoast Stampers (CAS183). As I mentioned in my previous post (Fall Thank You), I’ve had fall on my mind this past week. The leaf in this design was die cut from metal and colored with alcohol inks. I took a close up photo to capture the coloring a bit better.  The band is a die cut with a Memory Box die and the sentiment came from a clear set. Unfortunately I do not know the manufacturer of this stamp set since I have long ago discarded the packaging. Thanks so much for stopping by!

Stay inspired,

Sabrina 


Close up of the die-cut metal leaf colored with alcohol inks.


Sunday, August 19, 2012

Fall Thank You


Hello!

Welcome and thanks for stopping by. Today’s featured design is a fall themed thank you card that fits into a Splitcoast Stampers challenge.  I followed a technique called water stamping outlined in Splitcoast Stampers to make the background paper. I also followed a sketch issued for a contest by Hero Arts for the design (although I did not enter the contest). I’m in a fall sort of mood these days--I am looking forward to seeing the many colors as the leaves change and the temperature cools. Now that football  pre-season is underway, fall will be here before we know it. :-)  I made the leaf focal point by die cutting metal and coloring the metal with alcohol inks. I used a Fiskar's clear backgrounder stamp (from a set called Henna Petals) on paper that had been sponged with various SU! orange toned inks to create the water stamped background. That’s all for now.

Stay inspired,

Sabrina


Thursday, August 16, 2012

Square Birthday


Hi!

I’m here with a post that I submitted to the CASual Fridays Challenge CFC65.  The challenge is to create a clean & simple square card.  I’m not sure how clean and simple my card is but I thought I would submit it anyway. My card is based on a technique/pattern called “the Traditional Pattern Card 1” from a book titled “The Art of Card Making” by Claire Sun-ok Choi, Lisa Kerr, and Susan Jaworski-Stranc (2005).  The technique involved overlapping triangles and trimming to create a flat, sort of patchwork design with crinkled papers and faux stitching. I strayed from the technique outlined in the book which called for using graph paper, metal ruler and an awl among other tools. I opted for simply punching squares and forming triangles from the squares. I then simply tucked the corners of the squares instead of creating an actual flat patchwork. For my cards shown below, I used the overlapping triangles to create a focal point for a masculine birthday card. The triangles were cut from patterned paper that I made with background stamps and I also used a die cut (from metal) as a centerpiece.  I’ve included photos of two different cards I made with the same copper centerpiece--I stamped a sentiment on one and I used a rub on “Happy Birthday” sentiment on the other. That’s all for now--thank you so much for looking!

Stay inspired,

Sabrina


Saturday, August 11, 2012

Believe -- CAS182


Hi there!

I’m back with a post for another card I submitted to the Splitcoast CAS182 color challenge to use dark blue and white. This card is a winter/Christmas themed card with a bit of sparkle and lots and lots of heat embossing. I tried focusing on stamping as opposed to using die cuts (my usual inclination) for the two cards I created for CAS182 (see Clear, Cool Night for my other submission). The holiday season card in this post involves using a border stamp (positioned back to back) to create a larger snowflake flourish background design.  I took a photo of an impression I made in black ink to show what the border stamp looks like (below). I then layered the embossed sentiment over the point where the back to back borders met. I heat embossed the flourishes, the sentiment and even the edges of the top panels. Some SU! Dazzling Diamonds glitter adds just a tiny bit of sparkle. Thanks for stopping by!

Stay inspired,

Sabrina


Below is a photo of the impression of the Hampton Art border stamp that I used to create the background...


card details:
Paper:  SU! Not Quite Navy, White card stock
Stamps: Inkadinkado sentiment, Hampton Art snowflake border
Other: White and silver embossing powders, SU! Dazzling Diamonds glitter, Versamark ink, Zig 2-way glue, dimensional adhesive 

Friday, August 10, 2012

Clear, Cool Night


Happy Friday!

It seems like it’s been a long while since I’ve checked in. I skipped out on entering challenges last week and took some time off to celebrate my anniversary but I’m slowly getting back on track. Today’s post features a card I made for Monday’s Splitcoast Clean and Simple color challenge (CAS182) using the colors dark blue and white. The extremely hot temperatures lately have me thinking of the cooler days ahead as we approach fall. I began this design with the desire to use different techniques from my normal tendency of using die cut images for a focal point. I used sponge-shading for the background and used a mask to create the moon. The sentiment is Ecclesiastes 3:11--the stamped impression didn’t come out clear (a combination of user error and the fact that the text is too small for heat embossing). Both of the stamps featured on this card are old ones that have been in my stash (more like collection) for who knows how long. Still sticking with my personal challenge to utilize materials that I have on hand and have overlooked during my busy days. I’m just thankful that I have the time to play in my studio these days. :-)  That’s all for now--thanks so much for looking.

Stay inspired,

Sabrina


card details:
Paper:  white, black, SU! Not Quite Navy card stock
Ink: SU! Bashful Blue, So Saffron, Pacific Point, Midnight Muse
Stamps: Inkadinkado (trees), sentiment from Unity Stamp Co or CHF? (it is no longer in its packaging but it’s an old release)
Other:  circle punch (for masking), ribbon

Wednesday, August 1, 2012

Butterfly Note Card Set


Hi there!  I hope all is well with you and yours.  I'm taking a break from playing the challenges this week but wanted to pop in to share a recent project.  I just shipped a set of note cards that I made for a client who requested simple notes with a butterfly theme.  She mentioned that she loves the color royal blue so I made two different designs and incorporated that specific request in one of them.  The first design is all white and involves dry embossing with a bit of sparkle added through a tiny bit of glitter.

The second design features a dry embossed (several embossed patterns used for variety) fabric-covered butterfly die cut embellished with pearls.  I included a close-up shot of one butterfly patterns to show the texture. I used one of three different embossing folders on each of the blue butterfly cards to give the cards a slightly different look.


Finally, I created a hand crafted box to package the cards (tutorial at Splitcoast Stampers).  A butterfly was die cut from the same paper as the box and adhered to the top of the box. After taking the photos, I decided to finish the box off with a royal blue satin ribbon (wish I had taken a photo of it as it added some color to this primarily monochromatic project).


Thanks for checking in!

Stay inspired,

Sabrina

Thursday, July 26, 2012

Sympathy and Prayers -- CFC62


Hi!  I’m back today with a second entry to CAS-ual Friday’s CFC62 challenge “Back in Black”.  This time, I used a white card base with a large black panel. I heat embossed a stamped image of a flower in white and used alcohol inks to add a bit of color. A white heat embossed sentiment completes the front of the card. Thanks for looking!

Stay inspired,

Sabrina


card details:
paper:  white and black cardstock
stamps:  Hero Arts Potted Plant, SU! Petite Pairs
other:  corner rounder, gold glitter, Adirondack Alcohol Inks, white embossing powder

Wednesday, July 25, 2012

Gratitude... -- CFC62


Hi there!  I hope all is well with you and yours.  Thanks for visiting my site--I have very much enjoyed the wonderful comments and I appreciate you checking out my posts!

Today’s post is a simple card for the CAS-ual Fridays challenge which I have had lots of fun playing in. This week’s challenge is called "Back in Black" where the challenge is to create a Clean & Simple card using a black card base...

Stay inspired,

Sabrina


The ribbon used in this project is cream with a gold edging.


card details:
paper:  Black, SU! Soft Suede
tools:  Unity Co. Dream tree stamp, Hampton Art Studio G sentiment stamp, Provo Craft herringbone embossing folder, Celebrate It ribbon, black and gold embossing powders 


Thursday, July 19, 2012

Sending You Birthday Wishes -- CAS179, CFC61 & CASology


Hi!  Just popping in to share a simple card I made for some challenges:  The Splitcoast Stampers CAS challenge to use twine, the CAS-ual Fridays challenge to use strips of paper in a CAS design and for the new CASology challenge to make a "happy" card. For this card, I used strips of paper to make the birthday “present”.  I dyed normal baker’s twine in SU! Rich Razzleberry re-inker to create the bow. That’s all for now. Thanks for looking!

Stay inspired,

Sabrina


card details:
Paper:  SU! card stock in certainly celery, pacific point, whisper white
Ink:  SU! Rich Razzleberry
Other:  Hampton Art Studio G sentiment stamp, MFT Die-namics Solid Bracket Border die, baker’s twine

Wednesday, July 18, 2012

Flowering Christmas Tree -- CC384


Hello!  I hope all is well with you and yours. It’s been a busy week this week as well as last week but I finally had a little time today to play in my studio. Today I made a Christmas card for the Splitcoast Stampers Color Challenge. I used a die cut for the main focal point but I did manage to incorporate a bit of stamping. :-) The flowers were layered and I added a bit of sparkle with gems and glitter. The sentiment as well as the "container" for the tree were heat embossed. I also experimented with some Copic markers in shading parts of the Christmas tree--something else I will having fun playing with more in upcoming projects.  Thanks for visiting!

Stay inspired,

Sabrina


Below is a different view...


card details:
Paper:  from Stampin’ Up!-- Very Vanilla and Certain Celery card stock, Certainly Celery (subtles collection) DSP
Tools:  SU! Apothecary Accents, Memory Box Flowering Christmas Tree, ProvoCraft Ribbon Slide dies; Corner rounder; Circle punches
Stamps:  Unity backgrounder, clear Christmas set (cannot recall the manufacturer)
Other:  satin ribbon, red glitter, red embossing powder, Copic markers, dimensional dots, Swarovski crystals


Sunday, July 15, 2012

You Make My Heart Sing!


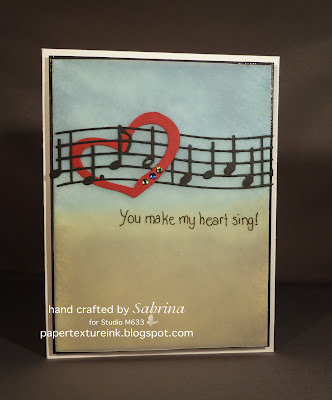
Hello!  Just popping in with a simple card I made for a recent CAS challenge in Splitcoast Stampers.  The CAS177 challenge was to use the color combination of Navy, Olive and white. When I began this card, I thought it would be easy to do a direct to paper background and use one of the new music dies I just purchased (and could hardly wait to use). I struggled to find a sentiment in my stash to go along with the theme so I (reluctantly) used a pen to print one. The vellum panel was a suggestion from my husband who walked by while I was putting elements together and noted that the background I created was a bit “too water color like”.  :-) I placed the panel there to humor him but liked the result in the end.  Well, that’s all for now!  Thanks for visiting my blog.

Stay inspired,

Sabrina


Card details:
Paper:  Heavy white card stock base, black card stock panel, water color panel, Vellum panel
Ink:  Ranger Distressed Inks Faded Jeans, Spanish Olive Versamagic Chalk
Other:  Memory Box “Virtuoso Music” die, Sizzix Triple Chocolate Truffle Hearts Sizzlit, Swarovski flat back crystal gems